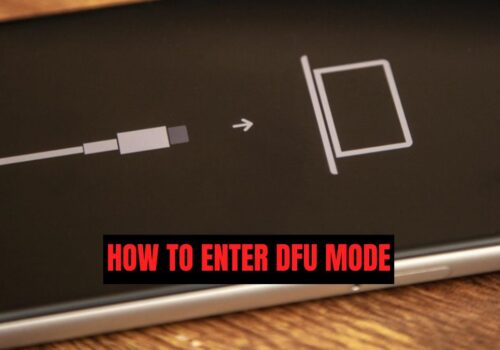
How To Enter DFU Mode On iPhone
G’day! If you’re reading this, chances are your iPhone’s giving you grief and someone’s mentioned this mysterious thing called “DFU mode.”
Don’t worry – as Auckland’s go-to iPhone repair experts at SMASHED IT, we’ve seen every iPhone drama under the sun, from Ponsonby professionals to Papakura tradies dealing with stubborn devices.
Table of Contents
What Is DFU Mode and Why Should You Care?
DFU (Device Firmware Update) mode is like your iPhone’s emergency room – it’s where you go when standard fixes just won’t cut it. Think of it as a deep reset that bypasses your iPhone’s normal startup process, giving you direct access to the device’s firmware.
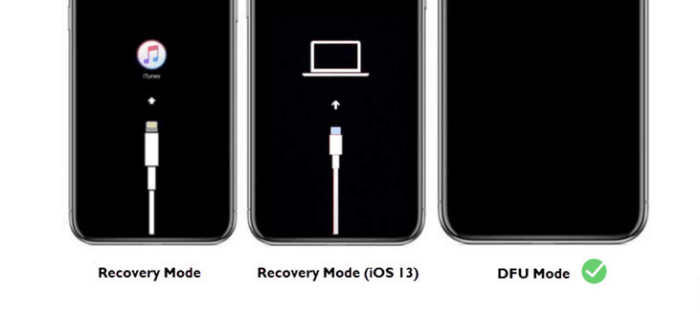
Unlike Recovery Mode (which shows that “Connect to iTunes” screen), DFU mode keeps your screen completely black while working its magic. It’s the difference between fixing a leaky tap and replumbing your entire Parnell villa – sometimes you need to go deeper.
When DFU Mode Becomes Your Best Mate
Here’s when us Kiwis typically need DFU mode:
- Your iPhone’s stuck in an endless boot loop (spinning wheel of doom)
- The device is completely unresponsive or “bricked”
- You need to downgrade iOS versions
- Recovery mode failed to fix persistent software issues
- Removing corrupted beta iOS versions
DFU Mode vs Recovery Mode: Know the Difference
Before we dive in, let’s clear up some confusion. Many Auckland iPhone users mix these up:
DFU Mode:
- Screen stays completely black
- Bypasses the bootloader entirely
- More powerful but riskier
- Used for severe issues and firmware modifications
Recovery Mode:
- Shows “Connect to iTunes” screen
- Uses the bootloader
- Safer for standard software issues
- Better for minor glitches
Think of Recovery Mode as your local GP, and DFU mode as the specialist at Auckland Hospital – you escalate when needed.
Essential Prep Work (Don’t Skip This Bit!)
Right, before you start pressing buttons like you’re playing whack-a-mole at Rainbow’s End, sort these basics:
Back Up Everything
This is crucial, mate! DFU mode restoration will wipe your iPhone cleaner than a Devonport beach after high tide. Create a backup through:
- iCloud (Settings > [Your Name] > iCloud > iCloud Backup)
- iTunes/Finder on your computer
- Third-party backup tools
Get Your Tech Sorted
- Latest iTunes (Windows/older Mac) or Finder (newer Mac)
- Genuine Lightning cable (no dodgy ones from the $2 shop)
- Reliable computer with decent internet
How To Enter DFU Mode: Step-by-Step for Every iPhone
The process varies depending on your iPhone model. Here’s how to nail it:
For iPhone 8, X, 11, 12, 13, 14, 15, and 16
This covers most iPhones you’ll see around central Auckland these days:
- Connect your iPhone to your computer with a USB cable
- Open Finder (Mac) or iTunes (PC)
- Quick tap Volume Up button and release immediately
- Quick tap Volume Down button and release immediately
- Press and hold the Side button until screen goes black (about 10 seconds)
- While holding Side button, press and hold Volume Down for 5 seconds
- Release Side button but keep holding Volume Down for another 10 seconds
Success check: Screen stays completely black, and your computer detects an iPhone in “recovery mode.”
For iPhone 7 and 7 Plus
Popular with Auckland’s budget-conscious users:
- Connect iPhone to computer
- Press and hold Side button + Volume Down simultaneously
- Hold both for 8-10 seconds
- Release Side button but keep holding Volume Down for 5-10 more seconds
For iPhone 6S and Earlier (Including Original iPhone SE)
Still plenty of these around Auckland:
- Connect iPhone to computer
- Press and hold Home button + Side/Power button together
- Hold both for 8-10 seconds
- Release Side/Power button but keep holding Home button for 10 more seconds
What Happens Next? The DFU Restore Process
Once you’re in DFU mode (remember, black screen = success), here’s what unfolds:
iTunes/Finder Will Detect Your Device
Your computer will show a message about finding an iPhone in recovery mode. Don’t panic – this is normal, even though you’re technically in DFU mode.
Choose Your Path
You’ll typically see options to:
- Restore iPhone (complete wipe and fresh iOS install)
- Update (attempt to preserve data – though less reliable in DFU)
The Waiting Game
The restore process downloads and installs fresh iOS firmware. Grab a flat white from your local Ponsonby café – this takes time depending on your internet speed.
How To Exit DFU Mode (When You’re Done)
Getting out is easier than getting in. Simply force restart your iPhone:
- iPhone 8 and later: Quick press Volume Up, quick press Volume Down, then hold Side button until Apple logo appears
- iPhone 7 series: Hold Volume Down + Side button until Apple logo shows
- iPhone 6S and earlier: Hold Home + Side button until Apple logo appears
Common DFU Mode Hiccups (And How to Fix Them)
“My iPhone Won’t Enter DFU Mode!”
Likely culprits:
- Timing’s off (most common issue)
- Faulty buttons
- iOS glitches
- Using wrong method for your model
Quick fixes:
- Double-check you’re using the right method for your iPhone model
- Try again with more precise timing
- Force restart your iPhone first, then retry
- Ensure your cable and computer connection are solid
“Help! My iPhone’s Stuck in DFU Mode!”
Don’t stress! Try these solutions:
- Force restart (as outlined above)
- If that fails, complete the restore process via iTunes/Finder
- Consider third-party tools like Tenorshare ReiBoot for stuck devices
Can You Update iPhone in DFU Mode?
Here’s where many Auckland users get confused. While DFU mode can install the latest iOS, it’s not really an “update” – it’s a complete reinstallation that wipes everything. Think factory reset, not software update.
For regular iOS updates that preserve your data, stick to:
- Settings > General > Software Update
- iTunes/Finder “Update” option (not in DFU mode)
Remember, DFU mode is powerful but destructive – it’s your iPhone’s nuclear option. Try gentler fixes first, and don’t hesitate to seek professional help if you’re uncomfortable with the process.
Still having dramas with your iPhone? Pop into our Parnell, Ponsonby and Papakura partner store (Erepair N Spares). Sometimes the best fix is letting the experts handle it – that’s what we’re here for!
